This is a quick post on how to configure your existing Jellyfin instance for hardware acceleration, assuming you have a setup similar or close to below:
- At least verson 10.11.11 of the official Jellyfin Docker container
- Linux host on a hypervisor
- 8th generation and higher Intel processor with integrated graphics.
- 8GB of usable RAM dedicated for Jellyfin
Hardware accelerated transcoding takes the burden away from your client’s CPU by off loading video transcoding tasks to your server’s GPU.
You can however bypass this behavior by forcing Direct Play on some client media player. Some clients may choose to make the switch on their own depending on their capabilities (like Chrome’s HTML Player).
Additionally, hardware acceleration also enables Tone Mapping which is an entire domain of it self. I didn’t play around with this because I don’t have any media that need it so far …
Choosing the GPU
- Can be either integrated or dedicated GPU
- Note that Intel processors ending with “F” have no integrated GPU
- Depending on the generation of your GPU, transcoding may not work for some video some video files. In this case, you may have to convert to the proper format supported by your CPU
RAM Requirements
Jellyfin recommends at least 8GB of ram. You may run out of memory if your server is trying to transcode a huge 4K file and when this happens you may see an Out of Memory error on your host resulting from a memory usage spike.
In some instances it may even bring down your host. To prevent this I’d recommend setting a memory limit of 8GB for your Jellyfin container (assuming you have already supplied more RAM for the host).
deploy:
      resources:
        limits:
          memory: 8G
Passthrough GPU to VM host
Add a new PCI Device hardware resource to your Linux host VM, select the GPU from the list. Reboot host.
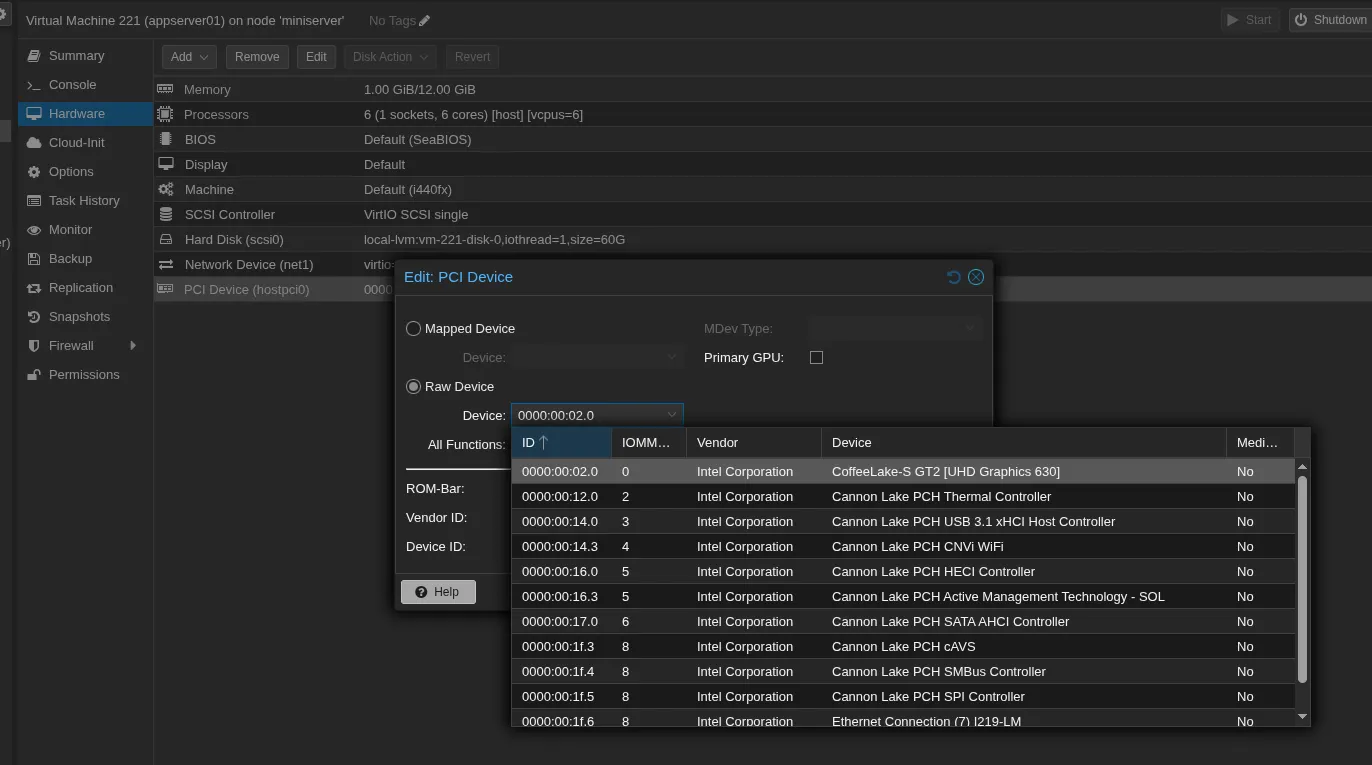
Then verify if the host can see the GPU:
lspci -nn | grep -Ei "3d|display|vga"
Check if the host is exposing the GPU. We’ll need this for Jellyfin later:
ls /dev/dri/dev/render128
Configure Container
-
Get render group ID from Linux host
This is a user group that gives access to GPU rendering capabilities without requiring root privileges.
getent group render -
Config container to use your render group to access host GPU
group_add: - '992' # replace with the ID shown in your host -
Tap into the GPU device node exposed by the host
devices: - /dev/dri/renderD128:/dev/dri/renderD128 -
Note the video codecs supported by your hardware
docker exec -it jellyfin /usr/lib/jellyfin-ffmpeg/vainfo -
Enable Intel QSV under Jellyfin dashboard settings and remove the codecs not listed above.
-
Check if OpenCL is loaded and running for tone mapping abilities
docker exec -it jellyfin /usr/lib/jellyfin-ffmpeg/ffmpeg -v verbose -init_hw_device vaapi=va -init_hw_device opencl@va
Configure Jellyfin Dashboard Setting
-
Enable Hardware Acceleration
Under Dashboard > Playback > Transcoding > Hardware Acceleration > Intel Quicksync (QSV)
-
Disable video codecs not listed in Step 4 of above section
Some video codecs may not be supported by your processor generation, in this case you can try to convert the video file to the supported version.
-
Set the Transcode Path to
/cache/transcodesfor transcode cache files.Make sure if you’re using volume mount, that you have at least 2GB of free space at all times.
Verify transcoding
Play a large 4K content from Jellyfin on a browser. On the bottom right of the player, choose Playback Info under the Gear icon.
If it says Transcoding under Play method, sweet …it’s working.
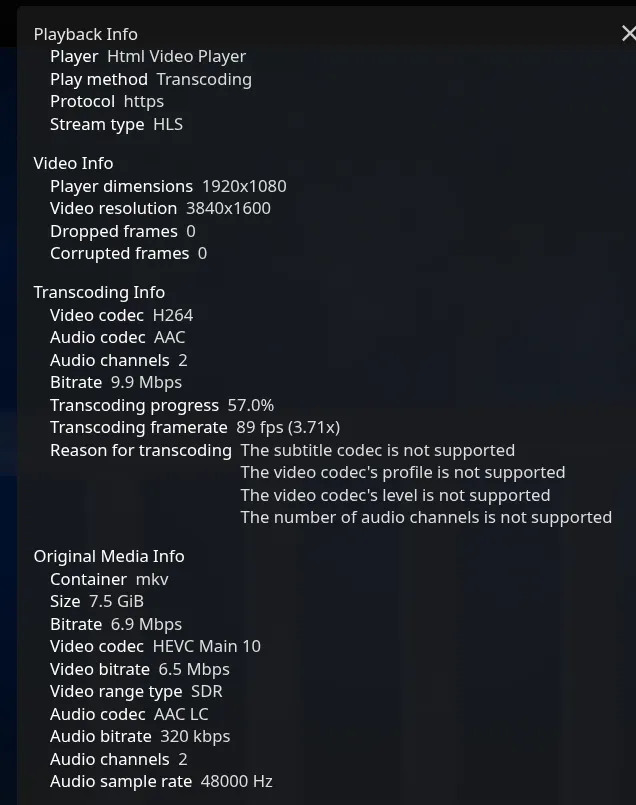
You can also view some cool stats using package intel-gpu-tools installed on your host. Play something on Jellyfin client and run command intel_gpu_top

Tips
- Make sure your Jellyfin instance has atleast 8GB of RAM
- Burned-in subtitles require more RAM and GPU processing (.pgs). Use text based subtitles (.srt) instead.
- If you have a server (like an old Pi or workstation) that is struggling to transcode but a powerful client computer, download Jellyfin Media Player instead of streaming from a browser. Dedicated players can handle transcoding way better than browsers by utilizing your client’s MPV player engine in the background.